
Stabilizing a Video Subject in Kdenlive
Published:
Introduction
In this post I want to show you how to stabilize a video subject (person, object, etc.) with Kdenlive.
When I was trying to learn how to do this, I could only find tutorials on how to use vidstab. However, that was not what I was looking for, because vidstab tries to stabilize the whole frame, and it can introduce distortions in some areas.
The video below shows three different clips: the original footage (left), the stabilized clip obtained with vidstab (middle), and the stabilized subject using my approach (right).
*The original clip used in this demonstration is available here.
We can see that vidstab is able to stabilize some parts of the clip; notice how the car in the background is less shaky. But, in my opinion, the best clip is the one on the right, where the subject is stable and positioned at the center of the clip.
Tracking the Subject
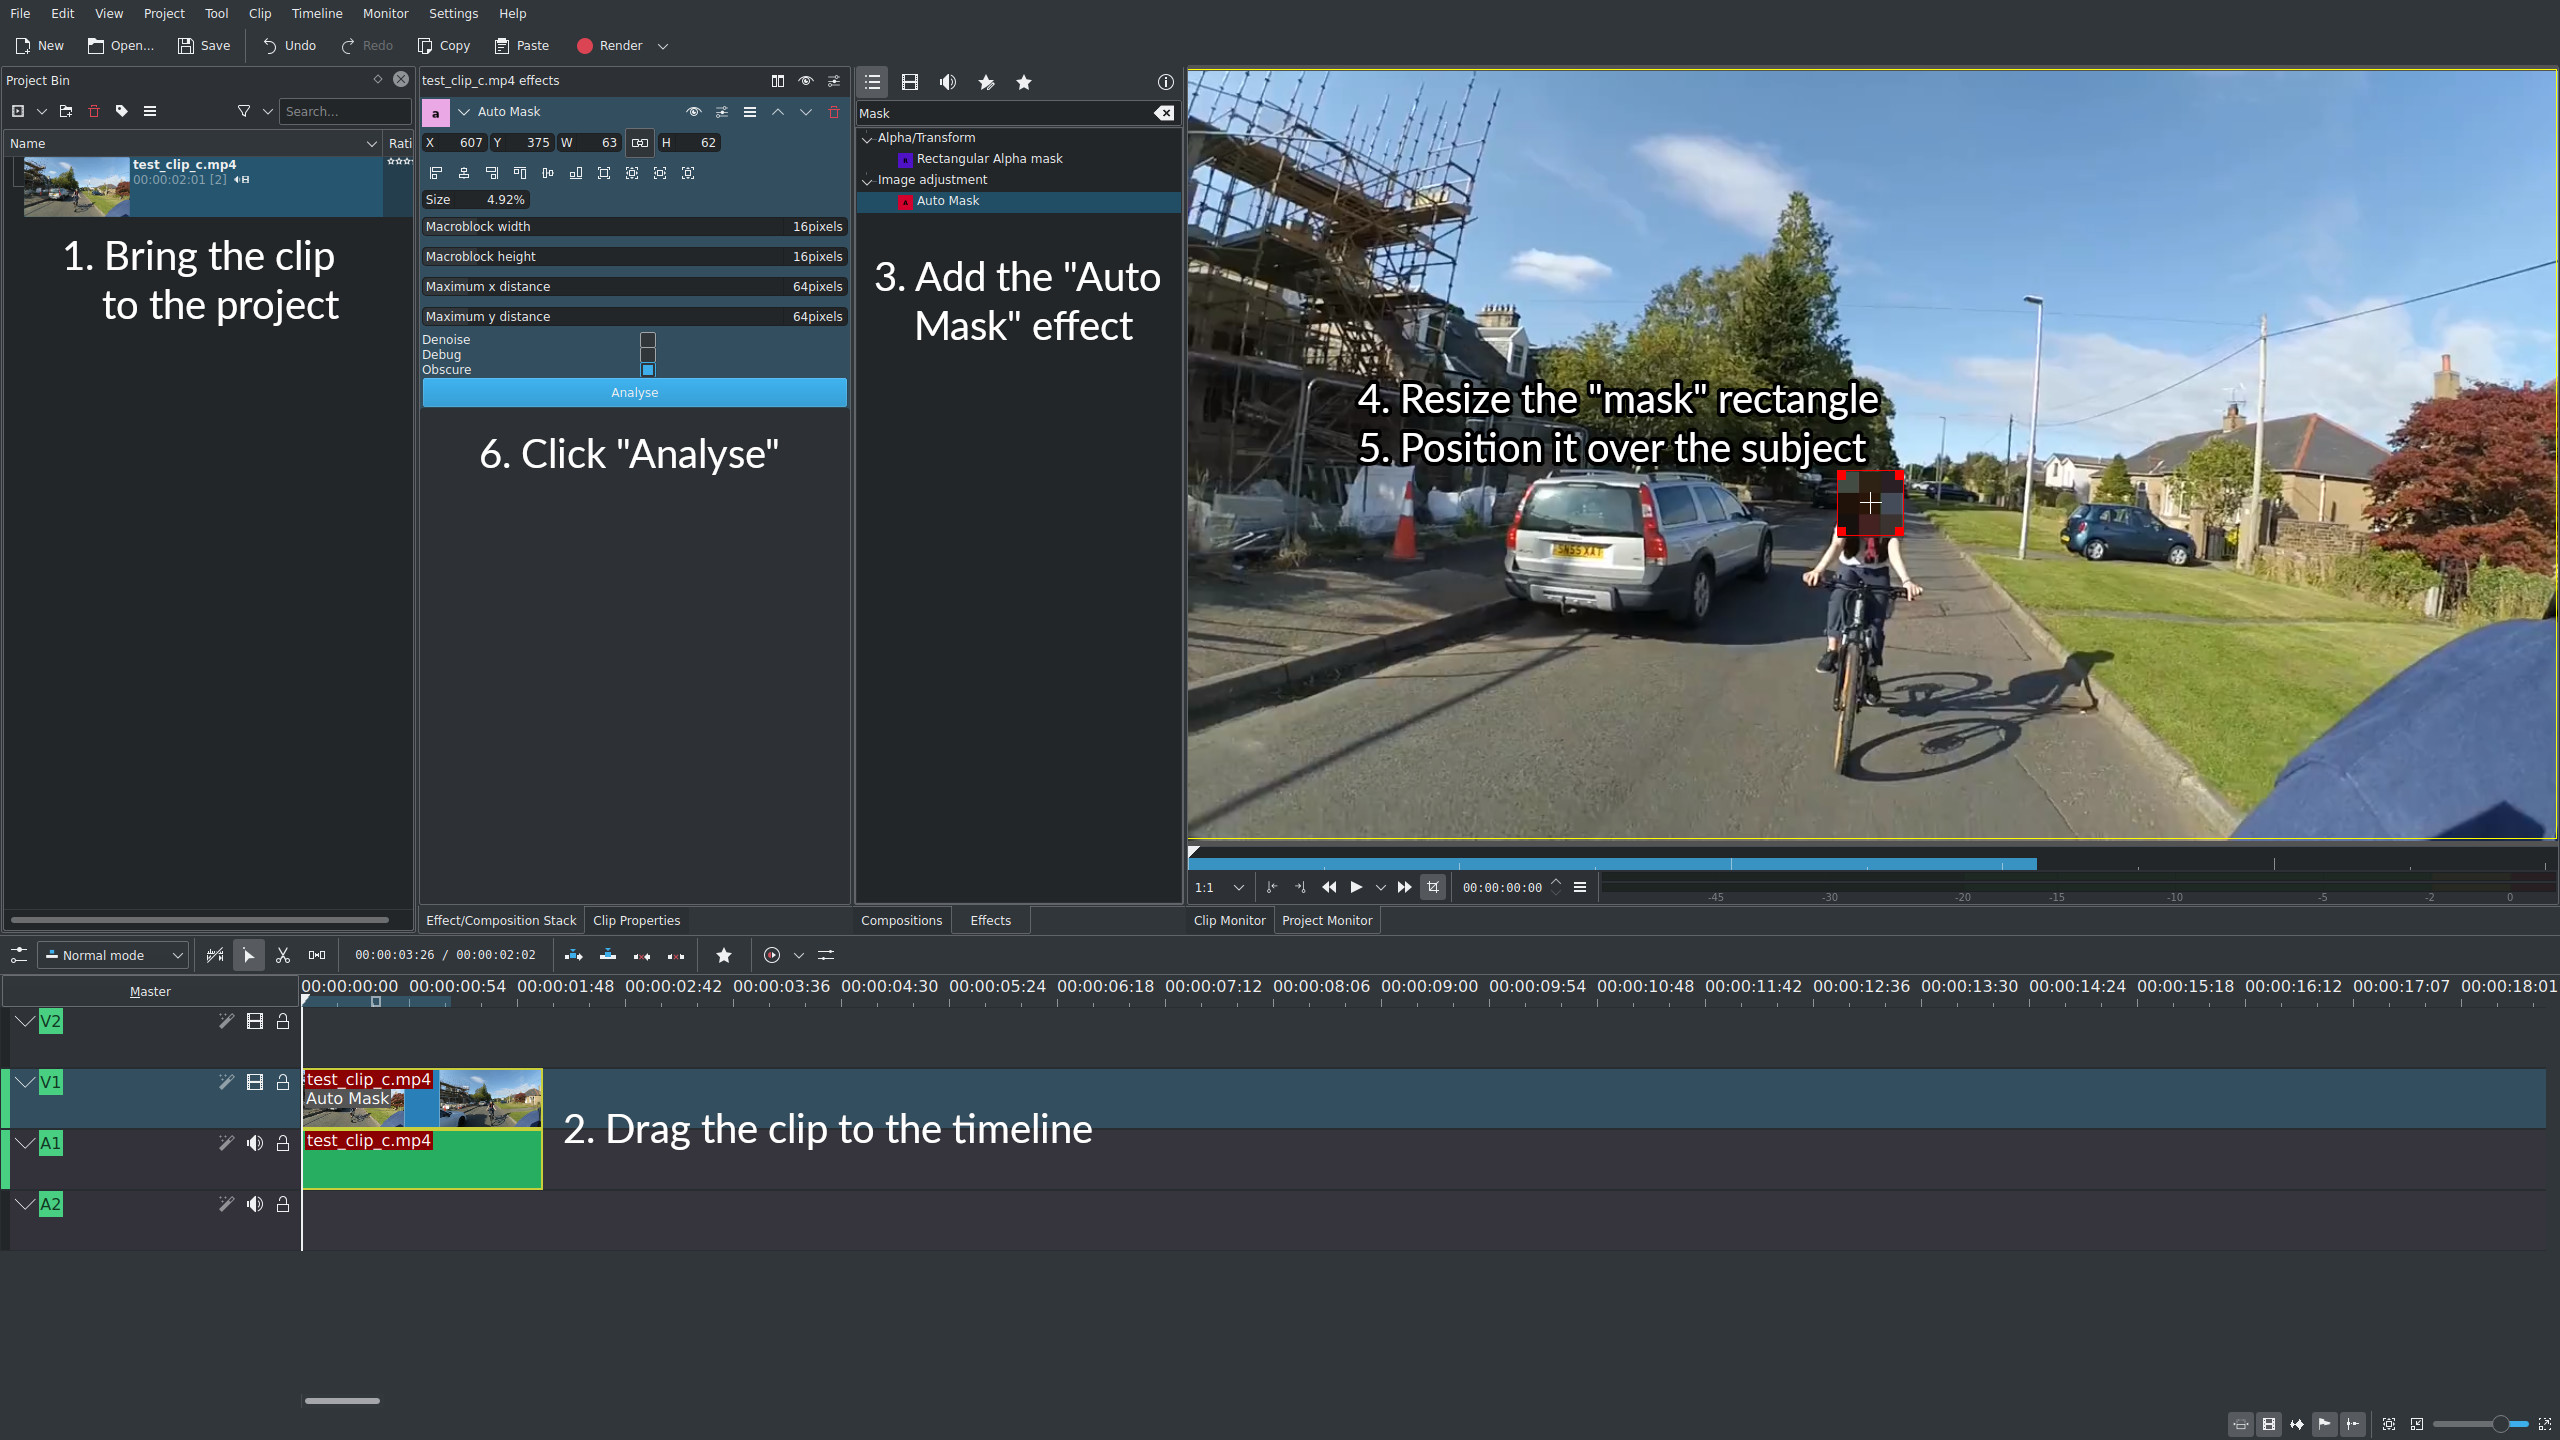
The first thing we need to do is to get the position of our subject at every frame of the clip. For that, Kdenlive has a neat effect called “Auto Mask”. Let’s go ahead and add that to our clip. (The clip should have been placed in the timeline by now.)
After adding the “Auto Mask”, a blurred rectangle should have appeared in the preview area; we are going to resize it and reposition it to roughly match the size and location of a feature point in your subject. In our case, the subject is a person, so we are going to resize the box to be slightly bigger than their face.
Finally, making sure the timeline cursor is positioned at the first frame of the clip, we are going to press the “Analyse” button in the options of the “Auto Mask” effect. This will scan each frame of the clip to track the face of our subject. Once the process finishes, a Tracking data link should appear in the “Auto Mask” effect. Click that link. The data has now been copied into our clipboard.
The image below summarises the steps required so far.
Processing the Tracking Data
Now that we have the tracking data in our clipboard, we are going to invert it. This will allow us to later use it as a correction for the position of each frame. To make things easier, I have automated this part of the process with a bit of JavaScript. So go ahead and follow the steps below.
1. Specify the frame size of your project.
2. Specify an offset to adjust the position of the subject in the frame. (Negative values are allowed.)
3. Paste the tracking data of the "Auto Mask" effect below, then click on the button.
4. The new tracking data is now living in your clipboard. Try to paste the text with Ctrl + V in a different window to see the result.
Stabilising the Clip
Let’s go back to Kdenlive. We can now delete or hide the “Auto Mask” effect. Afterwards, we need to add a “Transform” effect, and use its options to import the keyframe correction data from our clipboard.
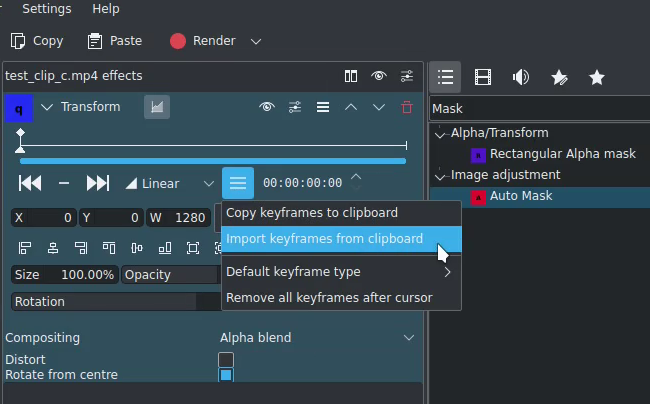
A small window should pop-up. We need to select "Position" from the dropdown, and then click OK.
And that is mostly it! If we playback the timeline, the clip should now be stabilised and focused on our subject. The only issue is that the frame is moving around, and we can see the black background of the project. A very easy workaround for this is to add a composition to our clip, and increase the zoom a bit, e.g., to 140%.
The End
This is the end of the post. Thank you for getting this far! Feel free to leave a comment below.
Comments