
Building a Self-Balancing Robot
Published:
Foreword. I had been wanting to build a small robotics project on my own free time for a while. I figured that putting together a self-balancing robot would be a good first try.
Since my background is Software Engineering I did not want to push my first attempt too much, especially because my understanding of Electronics Engineering is very limited… Therefore, I decided to play it safe and look for an already existing kit of some sort.
Turns out that even though I got a kit, I still had to do some minor tweaking. It would have taken me much longer to get everything to work by trial and error on my own — as in, a lot more fried boards — and for that reason I am very grateful for the help of my friends and colleagues François Heremans and Wolfgang Merkt.
Contents
The Balanbot Kit
I started by watching some videos on YouTube of people that had already built their own prototypes. I ended up finding a seemingly-robust self-balancing robot called Balanbot created by a small Chinese company called Maker Studio. Here is their promotional video.
I made up my mind and ordered the kit from their website for $149.00. I placed my order on March 29 and the parcel arrived safe and sound on April 16, which is more than reasonable for a standard shipment from China to the UK.
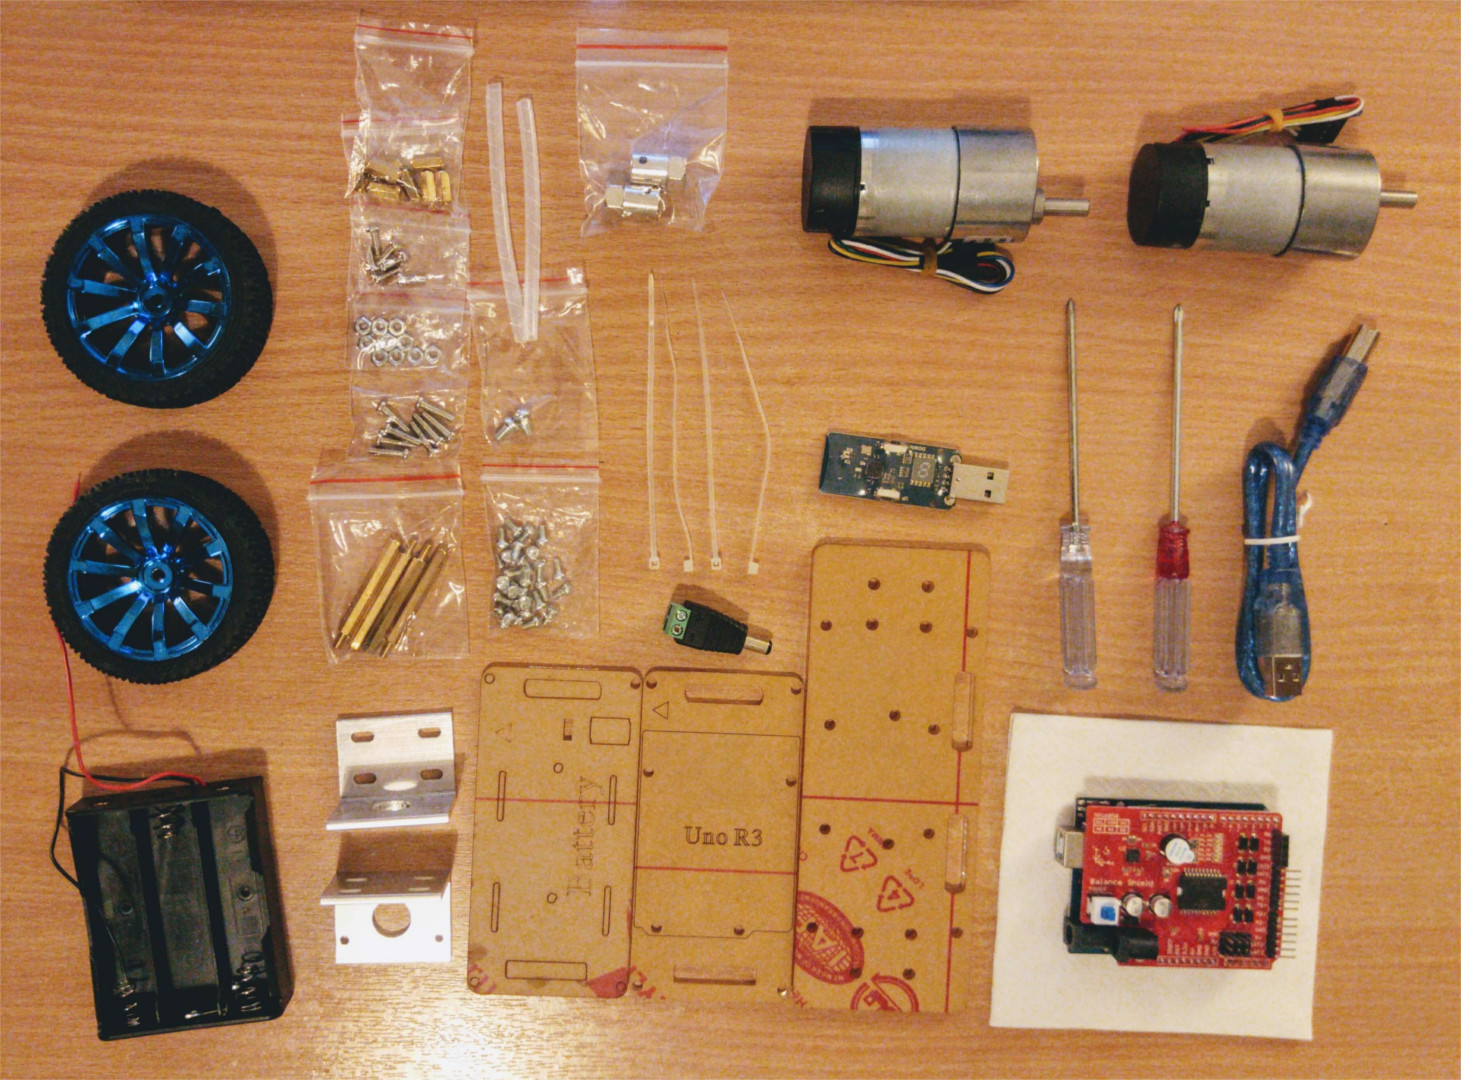
The package contained everything required to build the robot and even brought some extra parts — which is very thoughtful given that there is nothing more annoying than buying a kit and getting stuck because a bolt has gone missing.
I was quite happy with the shipped FlyBlue + FlyDongle: a BLE wireless Arduino-compatible board, which allows for wireless sketch uploads. The way it works is very simple: power the Arduino, plug the FlyDongle to the computer, and voila: the connection is established.
I do have some minor “complaints”, however:
One of the copper spacers was a bit damaged on one of its ends, making it impossible to drive the matching screw through it — and from all the extra parts shipped, copper spacers were not amongst them;
The Balance Shield power button cap was missing;
The online product page is quite deceiving and had me assuming the robot would come with a LiPo battery — after all, every picture and promotional video of the robot features it drawing power from a LiPo battery.
The package did feature a battery case for 3x 18650 batteries — which can be bought from Samsung on Amazon for £16.99. I would expect that, for the kit’s $149.00 price tag, the batteries would have been included, though…
Powering the Robot
As a workaround for the missing batteries, I headed over to HobbyKing and ordered a 3-cell Zippy 2200mAh battery, a Turnigy LiPo battery charger, a voltage checker, and some XT60 connectors.
The HobbyKing parcel arrived in less than 48-hours since I ensured I was getting the items from the UK warehouse.
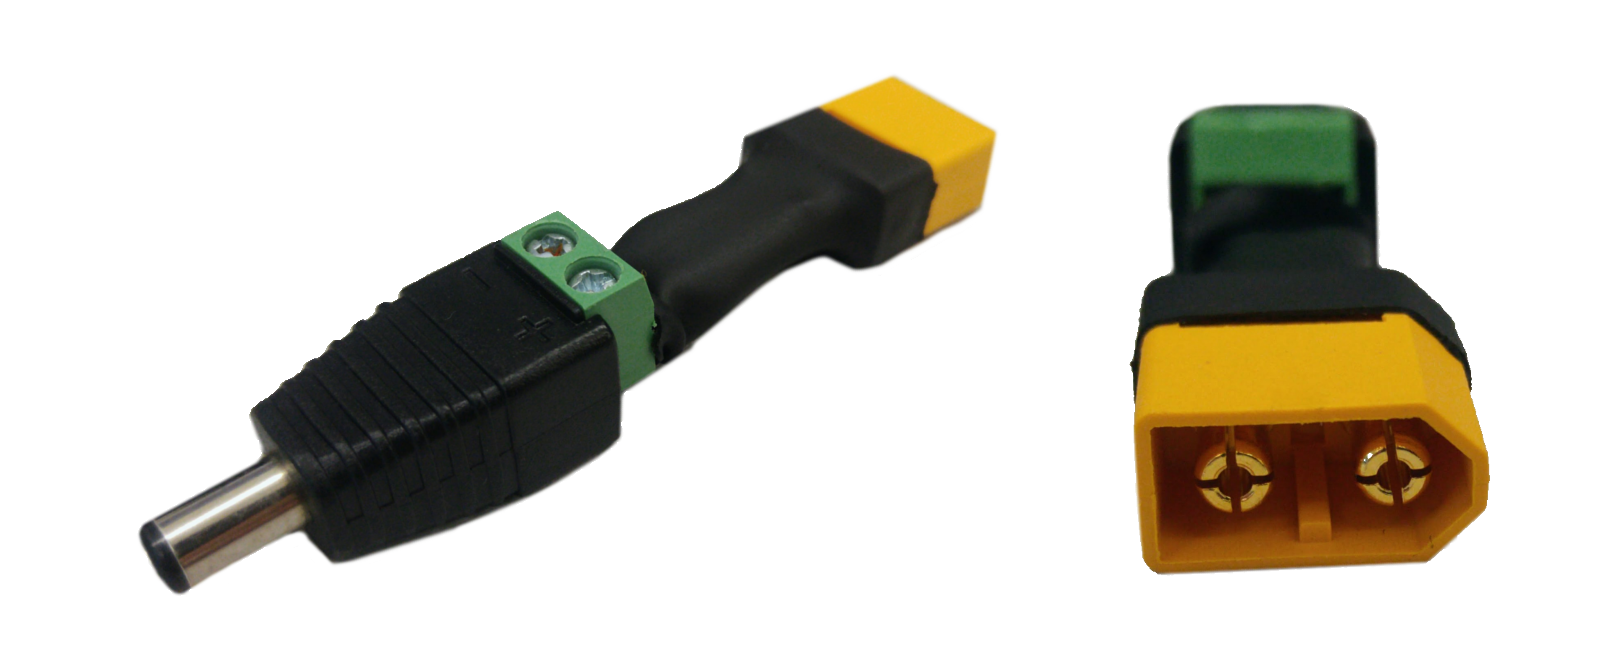
My next course of action was to make an adapter in order to connect the battery to the board. I used my very rudimentary soldering skills to solder the DC connector shipped with the kit to some wires, which in turn I soldered to one of the male XT60 connectors I got from HobbyKing. Finally, I applied a heat shrink tube over the adapter.
Building the Robot
At this point I had all the key ingredients ready and I could finally start to build the robot. The instructions to build it are not very easy to find, but here they are.
Rather than screwing the battery case shipped with the kit, I used the zip ties to secure my LiPo battery in place.
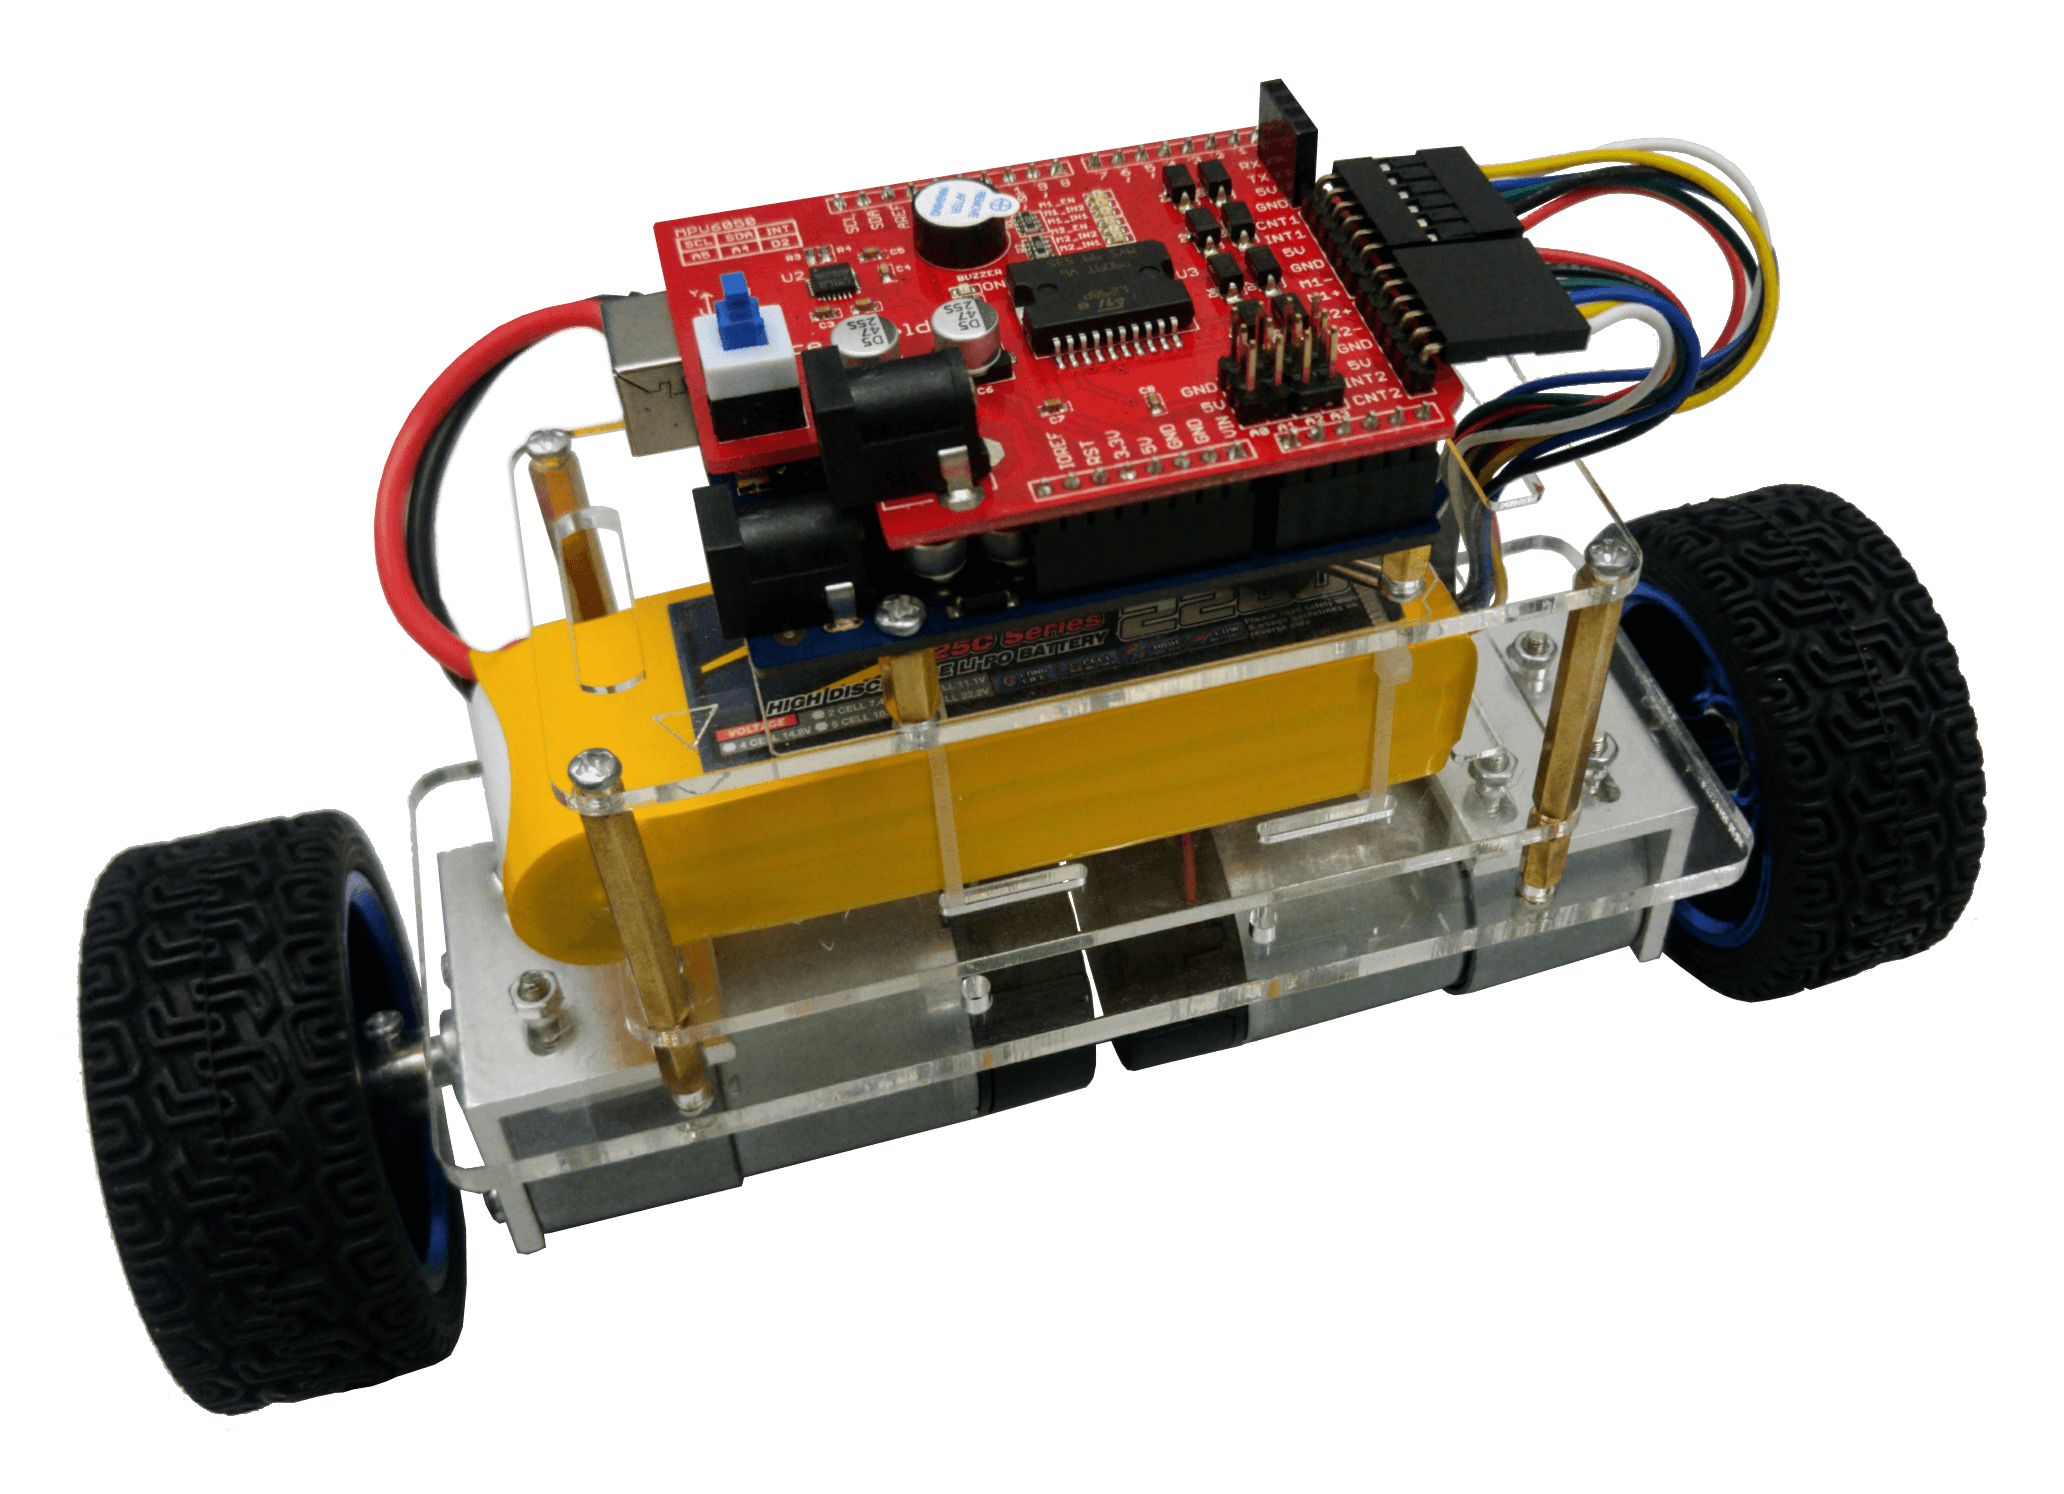
After having finished assembling the robot, I fired up Arduino IDE and deployed the code supplied by the Balanbot makers (available here). It was a “success”. Well… at least for 20 seconds! Turns out the robot stopped working right after those glorifying seconds of self-balancing.
I think I actually fried the ATmega328P of the FlyBlue board — the Arduino-compatible board shipped in the Balanbot kit. I might have supplied a higher voltage to the board than it could handle. My bad…
I ended up buying yet another Arduino UNO R3.
Fixing the Robot
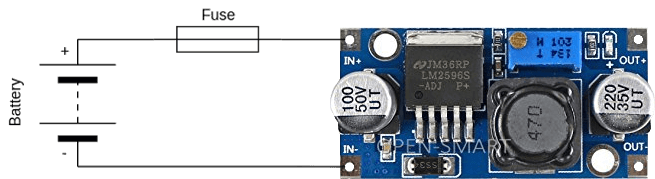
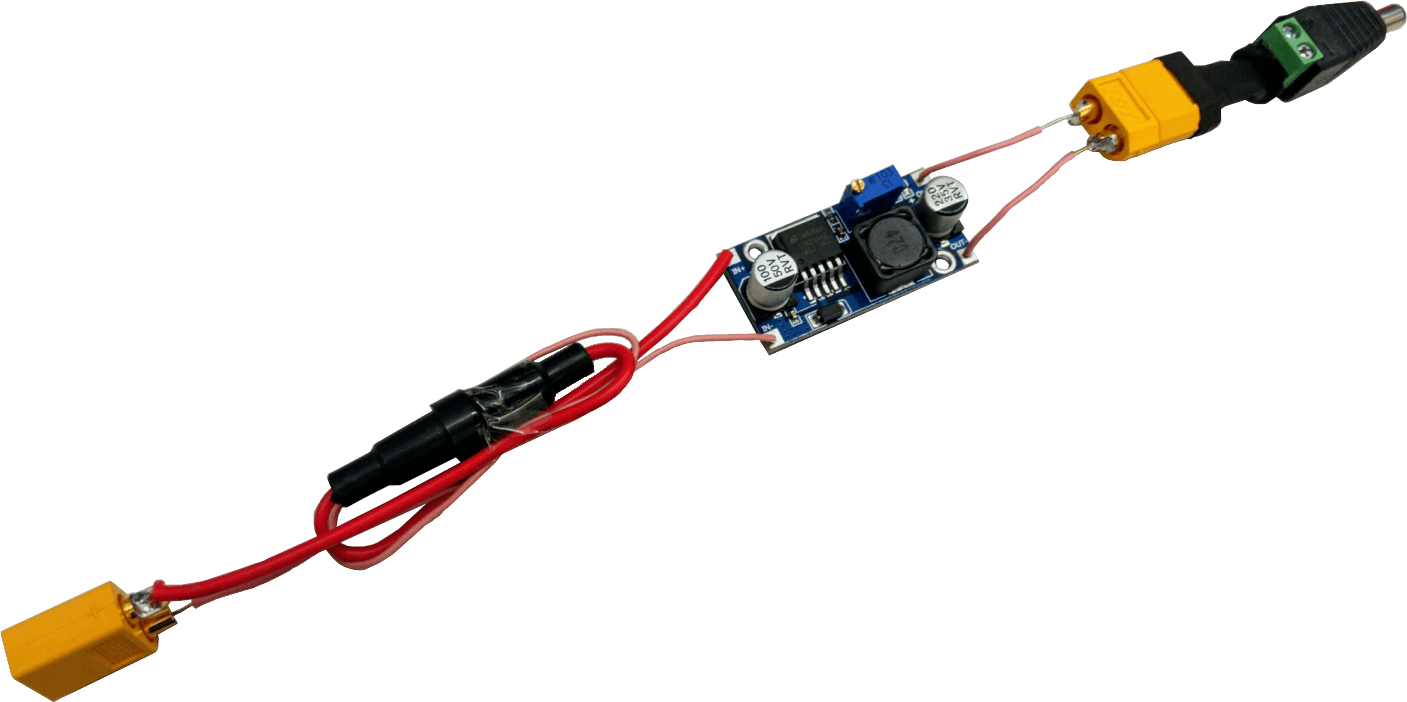
Clearly, there was a problem on my power supply, which burnt my previous Arduino board. In order to not repeat the same unfortunate situation, I had to make a more robust adapter to connect the battery to the Arduino board. The input voltage of the new board was between 5V ~ 9V.
As such, I ended up modifying the battery adapter according to the diagram shown in Figure 4:
- I added a buck converter to reduce the voltage coming from the battery to
8.5V; - I also added a fuse to protect the electronics from any current spike.
The final result of the adapter is shown in Figure 5.
With these last tweaks I got the robot to operate once again and I have not had any further issues with it so far.
Individual Components
To end this blog post, I have put together a list of the individual components required to build the robot. The items are listed from lowest to highest price. As expected, the total price of the robot is actually less than the cost of the Balanbot kit.
I did not include structural elements of the robot (such as acrylic boards, screws, bolts) because I assume it will be easy for you to get a hold of those. And maybe you even have some of the items I listed lying around somewhere!
Disclaimer: The prices in the table above might have changed since the publishing of this post.
Comments